

I was feeling creative, and sick of painting & basing models.
The this set of photos will take you through the construction.
I didn't do much that isn't obvious from the photos tbh, but here's a text description.
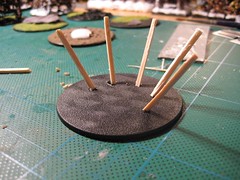
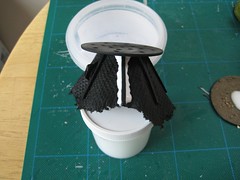
- constructed frame for kitchen roll (strong tissue paper) using matches. I angled the cuts of the matches so when placed on the base the match itself was angled outwards.
- glued pieces of slate which I'd normally use for basing to the matchsticks
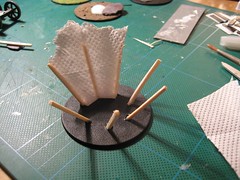
- tore and glued pieces of the kitchen roll to the frame using PVA glue, around the pieces of slate
- added PVA around the matchsticks
- added strength where required (joins of kitchen roll pieces) with PVA
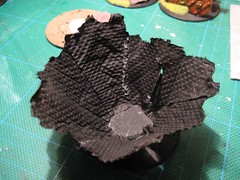
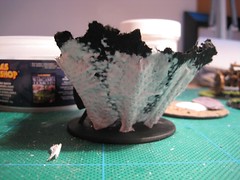
- basecoated with GW's black spray paint
This really hardened the top ripped up edges and it some strength - added more kitchen roll to the outside to hide the matchsticks
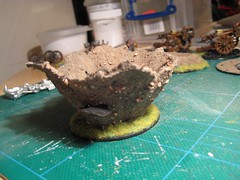
- Again with PVA coated with sand and the various bits I have for basing
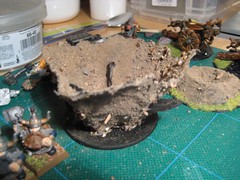
- finish basing it up with grass
- kaboom!

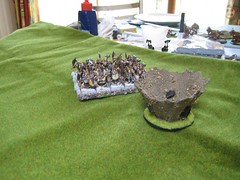
I'm quite happy with it, I also made some smaller craters which double as the 'after the dust has fallen' look for use after this impact crater.
These smaller ones (I have no photos) also double as cannon shot craters, however the larger one illustrated above is really the explosion from a stone thrower type weapon, and not a cannon. The dust/debris is thrown too vertically for it to be caused by a cannon.
To be honest these haven't seen much use after the initial weekend in 8th edition, but now that large infantry blocks are back, and stone throwers are more (?) powerful I think I'll be seeing them on the table soon.
No comments:
Post a Comment